Node-RED and MQTT to control NeoPixle
“Message
Queuing Telemetry Transport” sound complicated, but I’m sure most of as recognized
this as a MQTT for intercommunicating (publish and subscribe based massaging) protocol.
Here Im going to have small project to make communication with raspberry pi-based
dashboard and ESP8266 as subscriber.


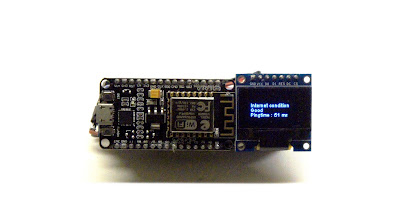
It is
also possible with ESP8266 with ESP8266 module. In this tutorial I’m going
to use raspberry pi with nodered to control NeoPixle leds which is mounted in
my ceiling.

Basic
Feature,
1) Interface
of 7inch touchscreen with RaspberryPi
2) Node
Red dashboard
3)
ESP8266 with NeoPixle with MQTT.
Basics you need to know,
1) Raspberry pi
2) 7inch Touch screen (optional)
3) ESP8266
4) NeoPixle LED strip
5) Power supply
Hardware design:
Basic connection with
NodeMCU.
1)
Connect data pin of NeoPixle
to D5 of NodeMCU
2) Updated Raspberry
pi with node red installed.
MQTT Transmitter

MQTT Receiver
MQTT Transmitter

MQTT Receiver
Code for NodeMCU:
---------------------------------------------------------------------------------------------------------------------------------------------
#include
<ESP8266WiFi.h>
#include
<PubSubClient.h>
#include
<Adafruit_NeoPixel.h>
#ifdef
__AVR__
#include <avr/power.h>
#endif
#define
PIN 5 // Data pin of NeoPixle LED
const
char* ssid = "*******"; // wifi ssid
const
char* password = "*******"; // wifi password
const
char* mqttServer = "*********";
// IP adress Raspberry Pi
const int
mqttPort = 1883; //
MQTT port number
const
char* mqttUser = "********"; // if you don't have MQTT Username, do not
define
const
char* mqttPassword = "*******";
// if you don't have MQTT Password, do not defin
String
messageTemp;
int red,
green, blue;
Adafruit_NeoPixel
strip = Adafruit_NeoPixel(400, PIN, NEO_GRB + NEO_KHZ800);
WiFiClient
espClient;
PubSubClient
client(espClient);
void
setup() {
#if defined (__AVR_ATtiny85__)
if (F_CPU == 16000000)
clock_prescale_set(clock_div_1);
#endif
strip.begin();
strip.setBrightness(255);
strip.show(); // Initialize all pixels to
'off'
Serial.begin(115200);
WiFi.begin(ssid, password);
while (WiFi.status() != WL_CONNECTED) {
delay(500);
Serial.println("Connecting to
WiFi..");
}
Serial.println("Connected to the WiFi
network");
client.setServer(mqttServer, mqttPort);
client.setCallback(callback);
while (!client.connected()) {
Serial.println("Connecting to
MQTT...");
if
(client.connect("ESP8266Client", mqttUser, mqttPassword )) {
Serial.println("connected");
} else {
Serial.print("failed with state
");
Serial.print(client.state());
delay(2000);
}
}
}
void
callback(char* topic, byte* payload, unsigned int length) {
for (int i = 0; i < length; i++) {
messageTemp += (char)payload[i];
}
red =
messageTemp.substring(messageTemp.indexOf('(')+1
,messageTemp.indexOf(',')).toInt();
Serial.println(red);
blue =
messageTemp.substring(messageTemp.indexOf(',')+1,messageTemp.lastIndexOf(',')).toInt();
Serial.println(green);
green =
messageTemp.substring(messageTemp.lastIndexOf(',')+1).toInt();
Serial.println(blue);
for(int i=0;i<400;i++)
{
strip.setPixelColor(i,red,green,blue);
strip.show();
delay(5);
}
messageTemp = "";
}
void
loop() {
client.subscribe("esp8266_NEO");
delay(5);
client.loop();
}
-------------------------------------------------------------------------------------------------------------------------
Final setup video.


Comments
Post a Comment