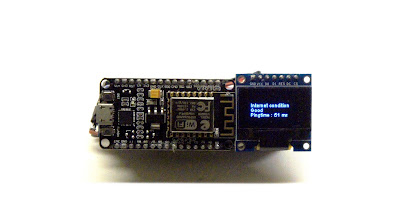
IFTTT button with NodeMCU
In this tutorial, we are
going to monitor the status of a switch using an ESP8266-12E. The goal of this
project is to show the endless possibilities that this small module and
integration with IFTTT.
Ingredient you need during this tutorial,
1) NodeMCU integration with Arduino IDE
2) Basic hardware
1) NodeMCU integration with Arduino IDE
2) Basic hardware
a. NodeMCU from Amazon
b. Breadboard from Amazon
c. Switch
d. 10K resistor
e. Jumper wires.
f. Internet connection 😉
3) Basic of IFTTT
Lets start with IFTTT,
IFTTT is a free platform that helps you do more interaction with all your apps and devices. In order to accomplish multiple tasks you have to sign up for one free service, which stands for “If This Then That”
Lets start with IFTTT,
IFTTT is a free platform that helps you do more interaction with all your apps and devices. In order to accomplish multiple tasks you have to sign up for one free service, which stands for “If This Then That”
You can
interconnect your IOT device with notification, Email, tweet, Facebook, etc…
To start with IFTTT,
Create a free IFTTT account.
Go to official site: https://ifttt.com/ and click the “Sign Up” button in a top of the page.
Once you signup…
Click on this
to make trigger activity.
In our case, we want to use an ESP-8266 with button to make a trigger.
Select maker
webhooks, It will allow you to make the IOT hardware integration.
I created an
event name SOS button_ written in the box. Do remember this name, you will need it in a future for testing. (in Arduino software)
So It will show
you if a button pressed then what…!!!
It has
multiple action services, which will allow you to connect through possible services
with simple selection. So In our-case we would like to send an Email (It could be a notification or anything else)
Compete this action with click and create an action.
So once it
is finished, Check by clicking a check now, It should not give you any error
during this.
Now, Go
back to search on the top, Write Maker Webhooks, It will show you below
options.
Now go to setting, and copy a URL and paste to internet browser.
It will show you your active key with event box.
It will show you your active key with event box.
Write an event
name in the box, "SOS_button" in our case and click on the test button in the
bottom.
This will
work as a trigger in absents of a trigger hardware and gives you an indication
of system working.
Congratulation..!!!
You finished your first step to IOT world, with basic IFTTT service. Now let’s finish on the hardware and coding part.
Hardware design/Connection:
Connect
NodeMCU to the breadboard with switch and resistor as shown above. I considered
Pin number D4 as an input, but this is not a same number in the Arduino IDE.
Node MCU pin
number mapping with Arduino IDE,
So
according to above image, My hardware pin number D4 is pin number 2 in the Arduino IDE.
Software:
Before you
start, make sure your Arduino IDE has installed ESP8266 board with a basic library.
Adafruit tutorial will help you to setup NodeMCU board with Arduino IDE.
Link: https://learn.adafruit.com/adafruit-io-basics-esp8266-arduino/overview
Adafruit tutorial will help you to setup NodeMCU board with Arduino IDE.
Link: https://learn.adafruit.com/adafruit-io-basics-esp8266-arduino/overview
Arduino
Code:
------------------------------------------------------------------------------------------------------------------------------------------------------
#include <ESP8266WiFi.h>
const char* ssid = "WIFI network";
const char* password = "WIFI password";
const char* host = "maker.ifttt.com";
const char* apiKey = "Your API key from the IFTTT";
int pin = 2;
volatile int flag = false;
const char* PIN_state = "not pressed";
void PINStatus() {
PIN_state = "SOS pressed";
flag = true;
}
void setup() {
Serial.begin(115200);
Serial.println("SOS button integration with IFTTT");
delay(100);
pinMode(pin, OUTPUT);
attachInterrupt(digitalPinToInterrupt(pin), PINStatus, FALLING);
Serial.print("Connecting to ");
Serial.println(ssid);
WiFi.begin(ssid, password);
while (WiFi.status() != WL_CONNECTED) {
delay(500);
Serial.print(".");
}
Serial.println("");
Serial.println("IP address: ");
Serial.println(WiFi.localIP());
}
void loop() {
if(flag){
Serial.print("connecting to ");
Serial.println(host);
WiFiClient client;
const int httpPort = 80;
if (!client.connect(host, httpPort)) {
Serial.println("connection failed");
return;
}
String url = "/trigger/SOS_Button/with/key/";
url += apiKey;
Serial.print("Requesting URL: ");
Serial.println(url);
client.print(String("POST ") + url + " HTTP/1.1\r\n" +
"Host: " + host + "\r\n" +
"Content-Type: application/x-www-form-urlencoded\r\n" +
"Content-Length: 13\r\n\r\n" +
"value1=" + PIN_state + "\r\n");
flag = false;
}
delay(100);
}
------------------------------------------------------------------------------------------------------------------------------------------------------
Please make sure you customize the highlighted area in CODE
So when ever you press a button, it will send an Email to registered mail ID.
Execution video:
Execution video:


thankyou somuch ................... i have tried somuch codes ............ butthis the only code executed successfully .
ReplyDeleteSir Bhaskar can you help me
DeleteHi Bhaskar, Thank you very much, Please let me know if you need any further details regarding project.
DeleteThank you so much
ReplyDeleteThank you for supporting, Please do not forget to share with your friends if you like content.
Deletehow do u add an extra button to this?
ReplyDeleteYou need extra coding, keeping adding value 1-2-3 number and same at IFTTT website, it will generate different interrupt.
Delete