Raspberry pi and openCV
In this tutorial we are going to learn face detection with help
of Raspberry PI and with PI camera. Before concluding on the OpenCV platform, I also
tried Processing 3.0 for face detection but processing software required more processing
power compare to OpenCV and it was creating lag in frames compare to OpenCV on PI platform.
This tutorial im going to show a step by step process to work
with OpenCV for beginner.
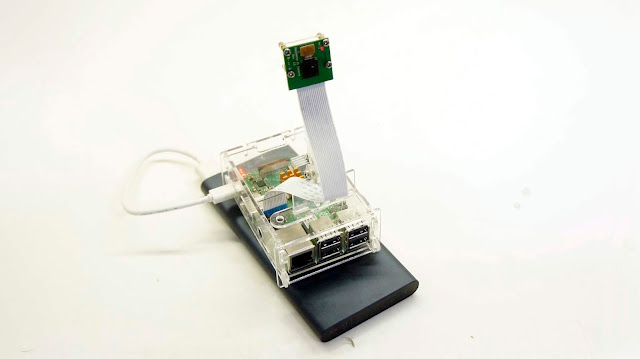
Hardware you would need to execute this project,
1) Raspberry pi development board with OpenCv
installed
a.
Im using RPI 3B+ with raspbian
b.
32GB SD card
c.
Python 3.0 with OpenCV
If you don’t have OpenCV in RPI, please refer
below link for download.
2) Raspberry pi camera module.
3) Power supply (5V 2A Power bank would work)
Install Raspbian image in the RPI:
Install and enable camera in RPI:
After installing camera please try this code below.
raspistill -o
image.jpg
It will capture image and store in name of image.jpg in your
local directory, it means camera configuration is inline with our requirements.
OpenCV with python 3.0 check,
Navigate to OpenCV samples directory in your PI
/home/pi/opencv-3.3.0/samples/python
You will see below listed examples ready to run,
Open video.py code and execute in terminal
You will see this below image,
Now everything is working well to move forward,
Lets start with simple video capture CODE in openCV platform.
Open Python 3 (IDLE)
Write “import cv2” It will enable use of open CV module in
python shell.
Now go to home/pi directory and make new empty file as name
of videocapture(No space in between) for simple video capture program. Do not
forget to put .py extension behind file name to make it python executable file.
Copy below code inside file and save, now code in thonny
python IDE, If that does not work then you can go to program menu and redirect
file in the thonny python IDE.
It is simple video capture code in python with OpenCV, this
code just capture video from camera module and show in screen.
-------------------------------------------------------------------------------------------------------------------------------------
import cv2
cap =
cv2.VideoCapture(0)
while(True):
ret, img = cap.read()
cv2.imshow('frame',img)
if cv2.waitKey(1) & 0xFF == ord('q'):
break
cap.release()
cv2.destroyAllWindows()
-------------------------------------------------------------------------------------------------------------------------------------
Now everything is set to move to face detection code. We are
going to use haarcascades library for face detection which might be already installed
with your open CV program.
To locate files, go to opencv-3.3.0/data/haarcascades. You will
see below list of xml files in folder.
Now again make new file in name of facedetection.py at
home/pi directory.
open file in thonny python IDE and copy below code to make face
detection code work.
-------------------------------------------------------------------------------------------------------------------------------------
import cv2
cap =
cv2.VideoCapture(0)
detector=
cv2.CascadeClassifier('/home/pi/opencv-3.3.0/data/haarcascades/haarcascade_frontalface_default.xml')
while(True):
ret, img = cap.read()
gray = cv2.cvtColor(img,
cv2.COLOR_BGR2GRAY)
faces = detector.detectMultiScale(gray,
1.3, 5)
for (x,y,w,h) in faces:
cv2.rectangle(img,(x,y),(x+w,y+h),(255,255,255),)
cv2.imshow('frame',img)
if cv2.waitKey(1) & 0xFF == ord('q'):
break
cap.release()
cv2.destroyAllWindows()
-------------------------------------------------------------------------------------------------------------------------------------
Please follow us for further updates.


Comments
Post a Comment