IOT - NodeMCU/ESP8266 with Amazon Alexa (RoomFreshener)

In this tutorial we are going integrate NodeMCU and make
Aroma Oil burner, control by Amazon Alexa.
If you own Aroma oil burner with candle, you may understand the system complexity. To make system work you need to
burn candle (In which lighting up candle and cleaning after use) inside pot and
candle is not controllable, particularly when you need very light aroma full
days and stop when you’re not in-side house. That was a reason to bit of smartness
to cater my everyday problem. In this tutorial im going to upgrade
conventional oil burner to electronics oil burner and add IOT with help of
NodeMCU to control and active by Voice command (Thanks to Amazon Alexa and ESP
team).
Ingredient you
need during this tutorial
1) NodeMCU
with Arduino IDE.
2) Basic Hardware
a.
Bread board
b.
Nichrome wire (Heating element)
You can buy online or get from non-functional Hair dryer.
c.
N-Channel MOSFET (TIP142 Or similar)
Gate/Base operating/Fire voltage in-line with NodeMCU 3.3 V
d.
Yellow LED.
To generate Candle light effect inside ceramic POT
3) Amazon Alexa
4) Aroma Oil burner with extra oil
To Start with,
before starting the project, I need to test current product
temperature to defuse oil. Once I get things on place I started
looking for alternate technology which can help me to replace candle.
One of the conventional technology which I came across was
nichrome wire. It is an old technology which was used in hairdryer/Iron/solder iron to convert electric energy in to heat. It is available as separate
piece of wire in local market/ Amazon.
Connect 1 inch of nichrome wire in-between positive and
negative wire of 5V 2A DC power source. (Please connect nichrome wire in power
off conditions) Due to internal resistance and material structure it will get
red-hot and doesn’t melt (Under certain voltage). So, once it is gets red hot
in ambient temperature @ 5V, cut wire at red hot length and now we can start integrating this assembly with ceramic
pot.
Make two holes on top side of pot and pass positive wire and
negative wire from individual holes. Fill up the holes from industrial adhesive
to make it permanent fit and water tight so oil could not get out.

In light-off condition You will see it is red hot in open AIR condition, So once you pore oil it cavity. It will start heating up aroma oil. In below picture you see nichrome wire in red-hot condition.


Once it is done, we can start on hardware integration
Schematics and connection,
Q1 = 2N2222
Q2 = TIP142 transistor (It is high power transistor to control Nichrom voltage.)

Q1 = 2N2222
Q2 = TIP142 transistor (It is high power transistor to control Nichrom voltage.)

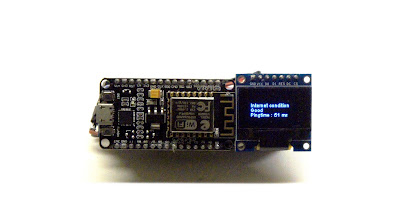
You can start this with breadboard, once everything is on place try to convert to general purpose board or PCB. In the final product i'm using smaller size of PCB which i can put inside a pot and connect with 5V adapter from the back side.
Arduino Code.
#include <Arduino.h>
#include <ESP8266WiFi.h>
#include "fauxmoESP.h" //required fauxmoESP library in arduino.
// Basic tutorial/library available at https://bitbucket.org/xoseperez/fauxmoesp
#define WIFI_SSID " WIFI SSID " //Please update
#define WIFI_PASS " WIFI PSW " // Please update
#define SERIAL_BAUDRATE 115200
fauxmoESP fauxmo;
const int numReadings = 10;
int readings[numReadings]; // the readings from the analog input
int readIndex = 0; // the index of the current reading
int total = 0; // the running total
int average = 0; // the average
int livewire = D2; // Nichrom wire connection
int inputPin = D1; // Yellow LED connection.
int light = 0;
// -----------------------------------------------------------------------------
// Wifi
// -----------------------------------------------------------------------------
void wifiSetup() {
// Set WIFI module to STA mode
WiFi.mode(WIFI_STA);
// Connect
Serial.printf("[WIFI] Connecting to %s ", WIFI_SSID);
WiFi.begin(WIFI_SSID, WIFI_PASS);
// Wait
while (WiFi.status() != WL_CONNECTED) {
Serial.print(".");
delay(100);
}
Serial.println();
// Connected!
Serial.printf("[WIFI] STATION Mode, SSID: %s, IP address: %s\n", WiFi.SSID().c_str(), WiFi.localIP().toString().c_str());
}
void callback(uint8_t device_id, const char * device_name, bool state) {
Serial.print("Device "); Serial.print(device_name);
Serial.print(" state: ");
if (state) {
Serial.println("ON");
light = 1;
// subtract the last reading:
} else {
Serial.println("OFF");
digitalWrite(livewire, LOW);
analogWrite(inputPin, 0);
light = 0;
}
}
void setup() {
Serial.begin(SERIAL_BAUDRATE);
Serial.println("FauxMo demo sketch- updated");
wifiSetup();
fauxmo.addDevice("RoomFreshener"); // device name/ Phrase you want to call to alexa
fauxmo.onMessage(callback);
pinMode(livewire, OUTPUT);
}
void loop() {
if (light == 1)
{ total = total - readings[readIndex];
readings[readIndex] = random(255);
total = total + readings[readIndex];
readIndex = readIndex + 1;
fauxmo.handle();
if (readIndex >= numReadings) {
readIndex = 0;
}
average = total / numReadings;
analogWrite(inputPin, average);
digitalWrite(livewire, HIGH);
delay(1);
}
else
{
fauxmo.handle();
}
}
Working video.


Comments
Post a Comment